EMP Spike - Animation Process
Hey all, I’m writing this blog post in an attempt to help convey my thought process when it comes to first person animation in video games. I know when I was first starting out in Blender years ago, resources for this specific niche were very scarce, specifically regarding anything unrelated to the technical aspects of this creative medium. Few people were out there explaining “ThisS is HoW I diD it Seeee! Lookit how dem dere keframes move!”
Dismissing old man Jenkins for a moment, this specific example isn’t the typical M4 platform or magazine fed weapon, it's a weapon called the EMP spike. Because of this model’s unique design, it required a bit more thought into how movements were conveyed; there’s no conventional M4 magazine or pistol slide to animate here.
My initial thought process with this weapon was “I want this bolt-like device that gets loaded, to be loaded in a stylistic and interesting way. I also want to incorporate more clean arcs in this reload than I usually would.” My blockout was informed by these two things as I started out on the key poses - and eventually I landed on this:
Something I discussed with our weapon’s artist, Andrew, was the possibility for this weapon’s bolt enclosure to be opened without the need for the left hand to reach the pink release mechanism at the rear of the weapon. He agreed and we eventually landed on some kind of “paddle” like device that would sit at the front grip where the left hand currently rests, that somehow releases that spring tension. You can see this visually represented at this early stage with the left thumb moving on the first frame.
I wanted this to help avoid the visual repetitiveness that I felt would arrive from (moving hand to pink latch to release bolt enclosure > hand goes off screen > hand reappears on screen and loads bolt > hand has to then to a similar motion to close latch) I also had been inspired by a weapon in SplitGate II I’d seen that incorporated a similar animation choice: where a reload starts by only having a part of the weapon actuate, as opposed to having the whole weapon move. I feel this subverts expectations in an interesting way, because when you press R on your keyboard now, your brain might ask “wait a minute, the gun hardly moved, but a part of it…opened. That’s not what usually happens when I compulsively press reload after only having fired 1 bullet”
Another thing I felt was worth mentioning is that the blockout stage is where I’m doing the most thought intensive part of animating, because you’re essentially referencing the end with each pose you plot on the timeline. So it's best to really take your time to flesh them out and make sure you're happy with each of them. Ask yourself if they flow well, could the main point of your animation be conveyed only through silhouettes, is it what you envisioned albeit in a slideshow-like state, etc. Whatever your answers, these poses will likely be seen in one way or another at the end.
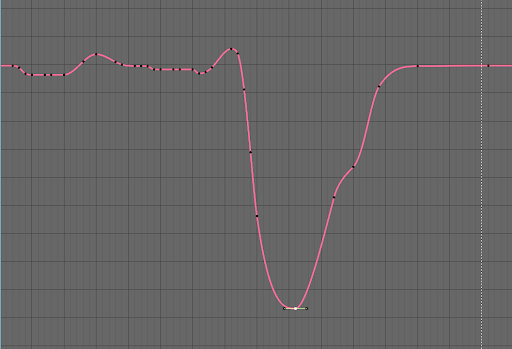
Something I’ll also do for animations I’m not as confident with, is I’ll go back and do a second pass on the blockout with more in-betweens, and really hone in how I want it to look by observing how things look in the graph editor. I think one of the biggest things here is you can see how much I reeled back the movement of the weapon itself for the bolt enclosure release, compared to blockout 1.

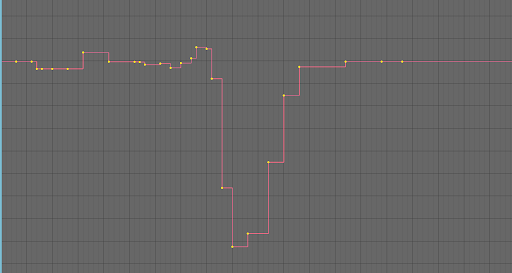
Now it’s the time that every animator probably hates, and that’s going from stepped interpolation to gasp…Bezier
I hate this part, I probably hate it more than most because it feels like all my work got recontextualized under the guise of “haha your work was only good because it moved at 5 frames per second!”
Anyways, once you’ve properly grieved the loss of your beloved blockout, and/or thrown your keyboard in an enraged state, it’s time to comb through each individual curve of your weapon’s armature and clean it up:
Left and Right Translation Axis
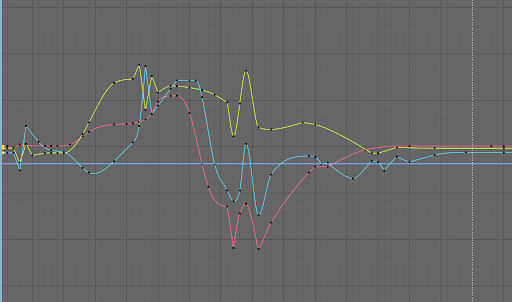
Rotational Axises
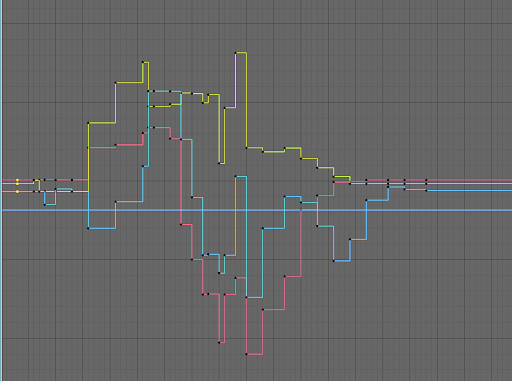
There is a LOT to cover here and doing it in just a blog post wouldn’t do it justice, but essentially, I comb through each keyframe of each curve individually and manipulate them depending on how I see they’re affecting the movement of the weapon.
At this point, you need to ask yourself again “What did I initially envision that’s not really coming through in the animations’ current state?” Maybe a sharp movement got heavily messed up because there’s too many frames involved. Maybe a movement across an axis isn’t intense enough. Or maybe you’ve accidentally invited Euler Lock into this equation, in which case I’d offer you my keyboard to throw as well. Literally nothing is off the table at this stage, so leave nothing unnoticed and really dig into the curves to find out what’s holding the animation back.
I find it valuable to clean all 3 rotation curves together, especially when it comes to reactions, which are those big spikes you’ll see in the curves above. It’s not always necessary, but I find it greatly helps in that first polish pass to clean all of them together, so the general rotation in the blockout is maintained to some degree.
With enough time and passes through the animation, eventually it will slowly begin to take shape into how you envisioned it:
I hope to do a livestream or a longer video at some point, because that’s certainly the most information-rich way to teach this kind of thing, but I hope this helped! Hopefully you can see some of these things and see how they potentially parallel your process. Or if you don’t animate, I hope this was informative and fun!
Something of note: I find it important to convey some visual appeal by animating the camera counter to the movement of the weapon/prop where possible. An excellent example of this can be easily performed on a weapon that has its magazine positioned at the rear, like this bullpup above. You’ll notice that as the gun moves upwards, the camera moves downwards.
There are other situations where this can be achieved on other weapons, but I find that this kind of an example is most ideal. Performing this same approach with the yaw or roll axis of your camera’s rotations also works, but I find it doesn’t always come across the same way as with the pitch.