

Procedural Content Generation (PCG) in Project S
Hey! I'm Andy, a Sr Artist at Chaotic Works, and I'm going to go through a couple of ways that we're using Procedural Content Generation (PCG) to quickly dress our spaces. I love learning new tools and techniques and I'm still relatively new to PCG myself, so think of this less as an expert guide and more as an honest take of how we've been using it.
PCG uses rulesets to automatically arrange and combine content derived from point data that's generated on a surface or referenced from an already placed asset. While it's most commonly used for scattering outdoor assets like foliage and rocks, we're also putting it to work in our interior spaces, which is great because it takes care of the repetitive work and frees us up to focus on the more interesting and meaningful side of environmental storytelling.
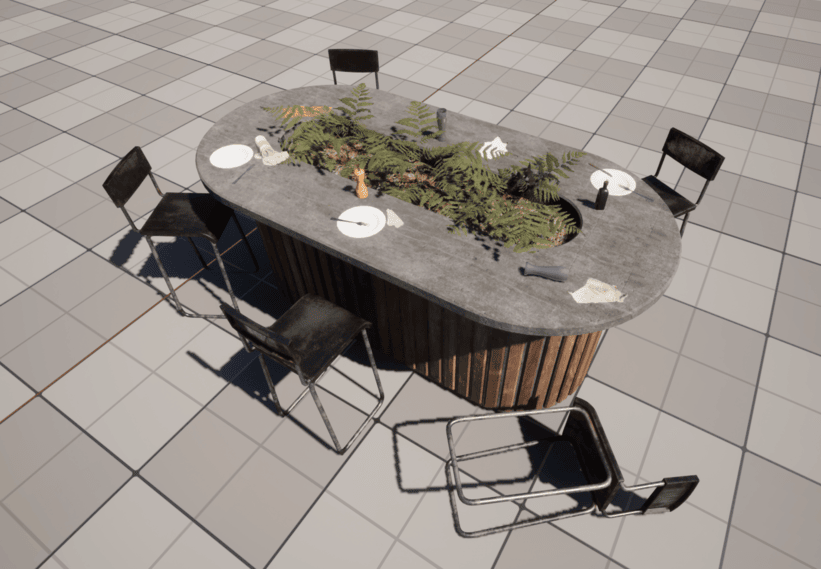
Take this table for example. It doesn't take long to put some chairs around it and scatter some props like foliage, plates, cutlery, condiments and a few trash items here and there. Now imagine having to do this multiple times while keeping each one unique. The time starts to compound quickly, so traditionally we'd make maybe 4 or 5 variations and duplicate them wherever we need them, but that in itself is somewhat limiting. With a little bit of setup and some rules, PCG gives us pretty much infinite variations with the ability to control it on a per instance basis.
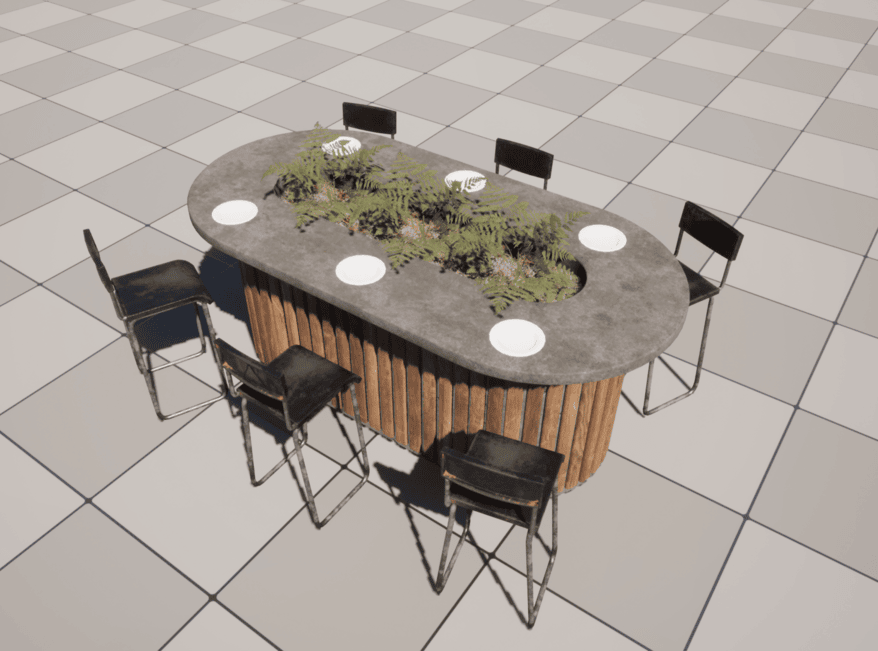
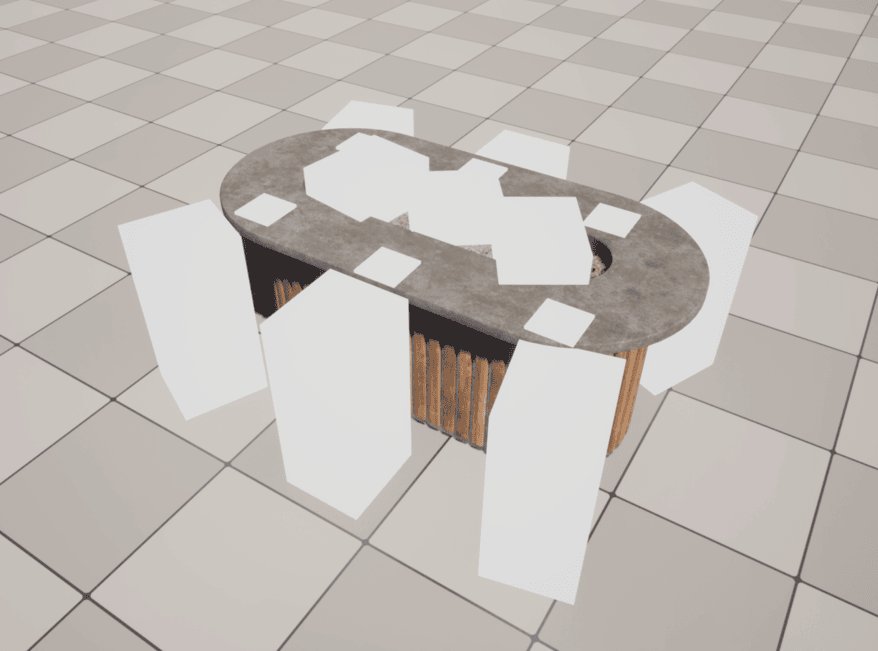
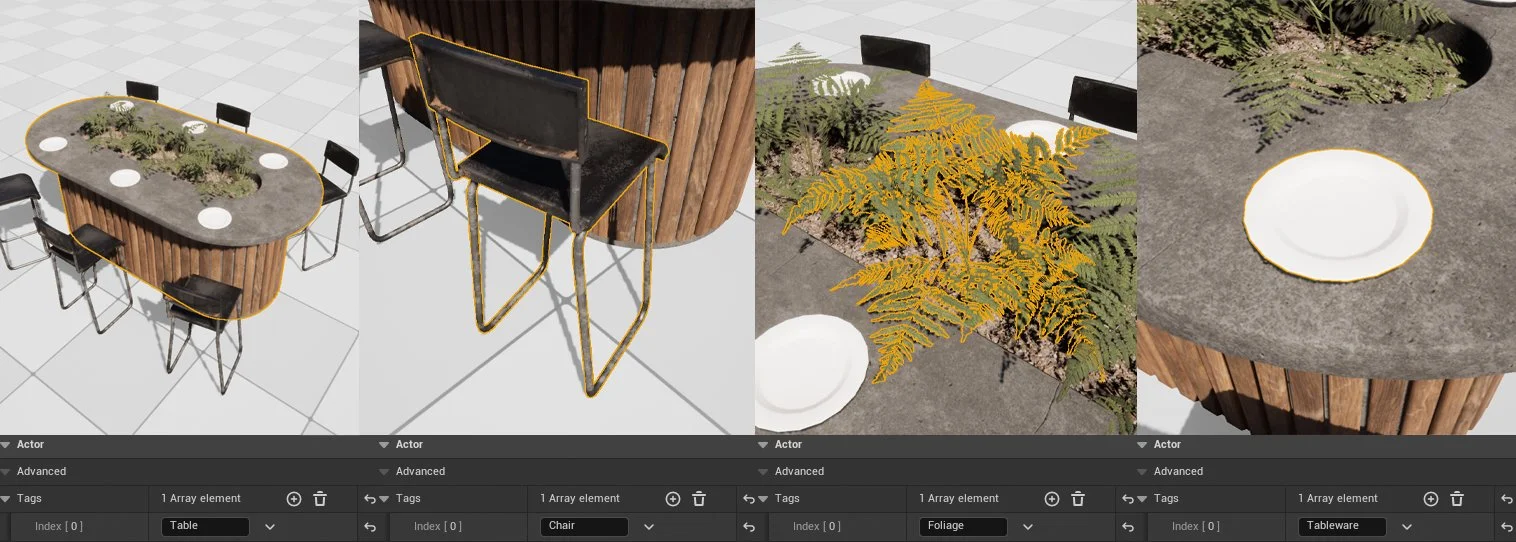
Here you can see the table rebuilt in its most basic form. Each asset has a tag associated with it, and those tags are what we reference in the PCG graph to retrieve the point data., which means the original asset itself is almost irrelevant. To keep things simple and easy to use, chairs are tagged 'Chair', plates are 'Tableware' and the plants are 'Foliage'. From there, we expose controls through Unreal Blueprints for things like visibility, amount and type.
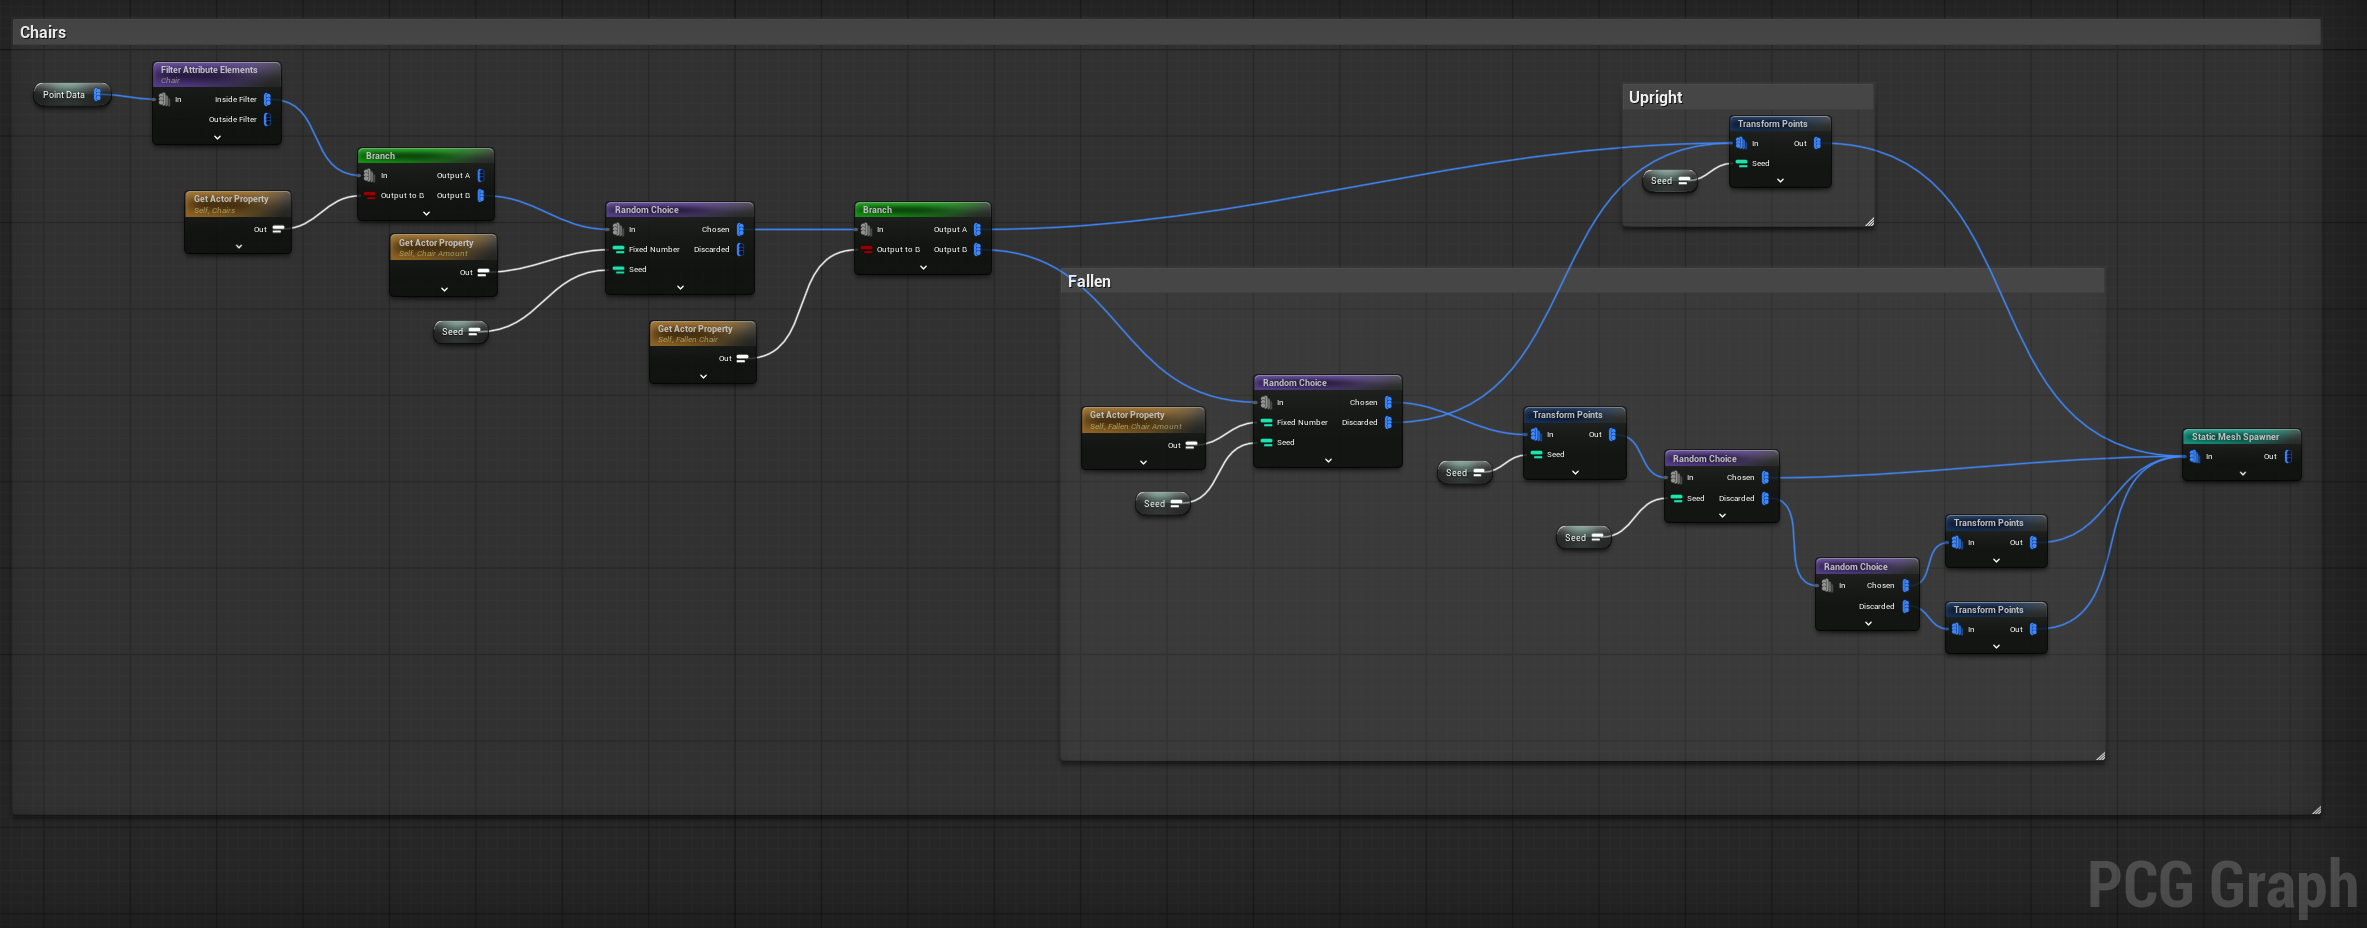
Each element of the table follows a very similar graph structure, generating the point data from the tag, running it through a few blueprint variables to control visibility and amount, then offsetting, rotating and spawning the mesh. Here are the chairs as an example. On top of the standard controls we also have a toggleable fallen state with its own amount variable, so the same chair asset can go from neatly placed to knocked over depending on the context of the space.
Where things get slightly more interesting is with the tableware. It follows the same structure but adds a 0 to 1 range that changes the mesh entirely from the original plate reference. So depending on where that value sits, what started as a plate in the setup could end up as a glass, a cup or a full place setting. Combined with the amount variable, you end up with tables that feel genuinely varied without any manual intervention.
For the final addition we use a mesh sampler to generate points directly on the table surface with the same toggle and amount variables to control what gets spawned. The tableware and foliage are merged into a final set of points and fed in, so the clutter avoids spawning anywhere that's already occupied.
On top of all of this, whilst the properties stay the same across instances, the whole configuration can be randomised by simply changing the seed. And if we want to throw caution to the wind completely, there's a checkbox that randomises all the toggles and sliders at once, so even we don't know what we're going to get.
In isolation, all this control for a single table might seem like overkill, but it really starts to pay off when you apply it to assets that get a lot of reuse, like shelving, benches, office desks and so on.
Environment PCG
Another way we're using PCG is through the more traditional volume based approach. Since our interior spaces are built from static meshes rather than landscape geometry, we rely on data assets and tags.
Data Assets in Unreal are non-actor assets used to store data, in our case lists of meshes and settings that can be retrieved directly within a PCG graph. We've built various ones to house our modular and bespoke meshes.
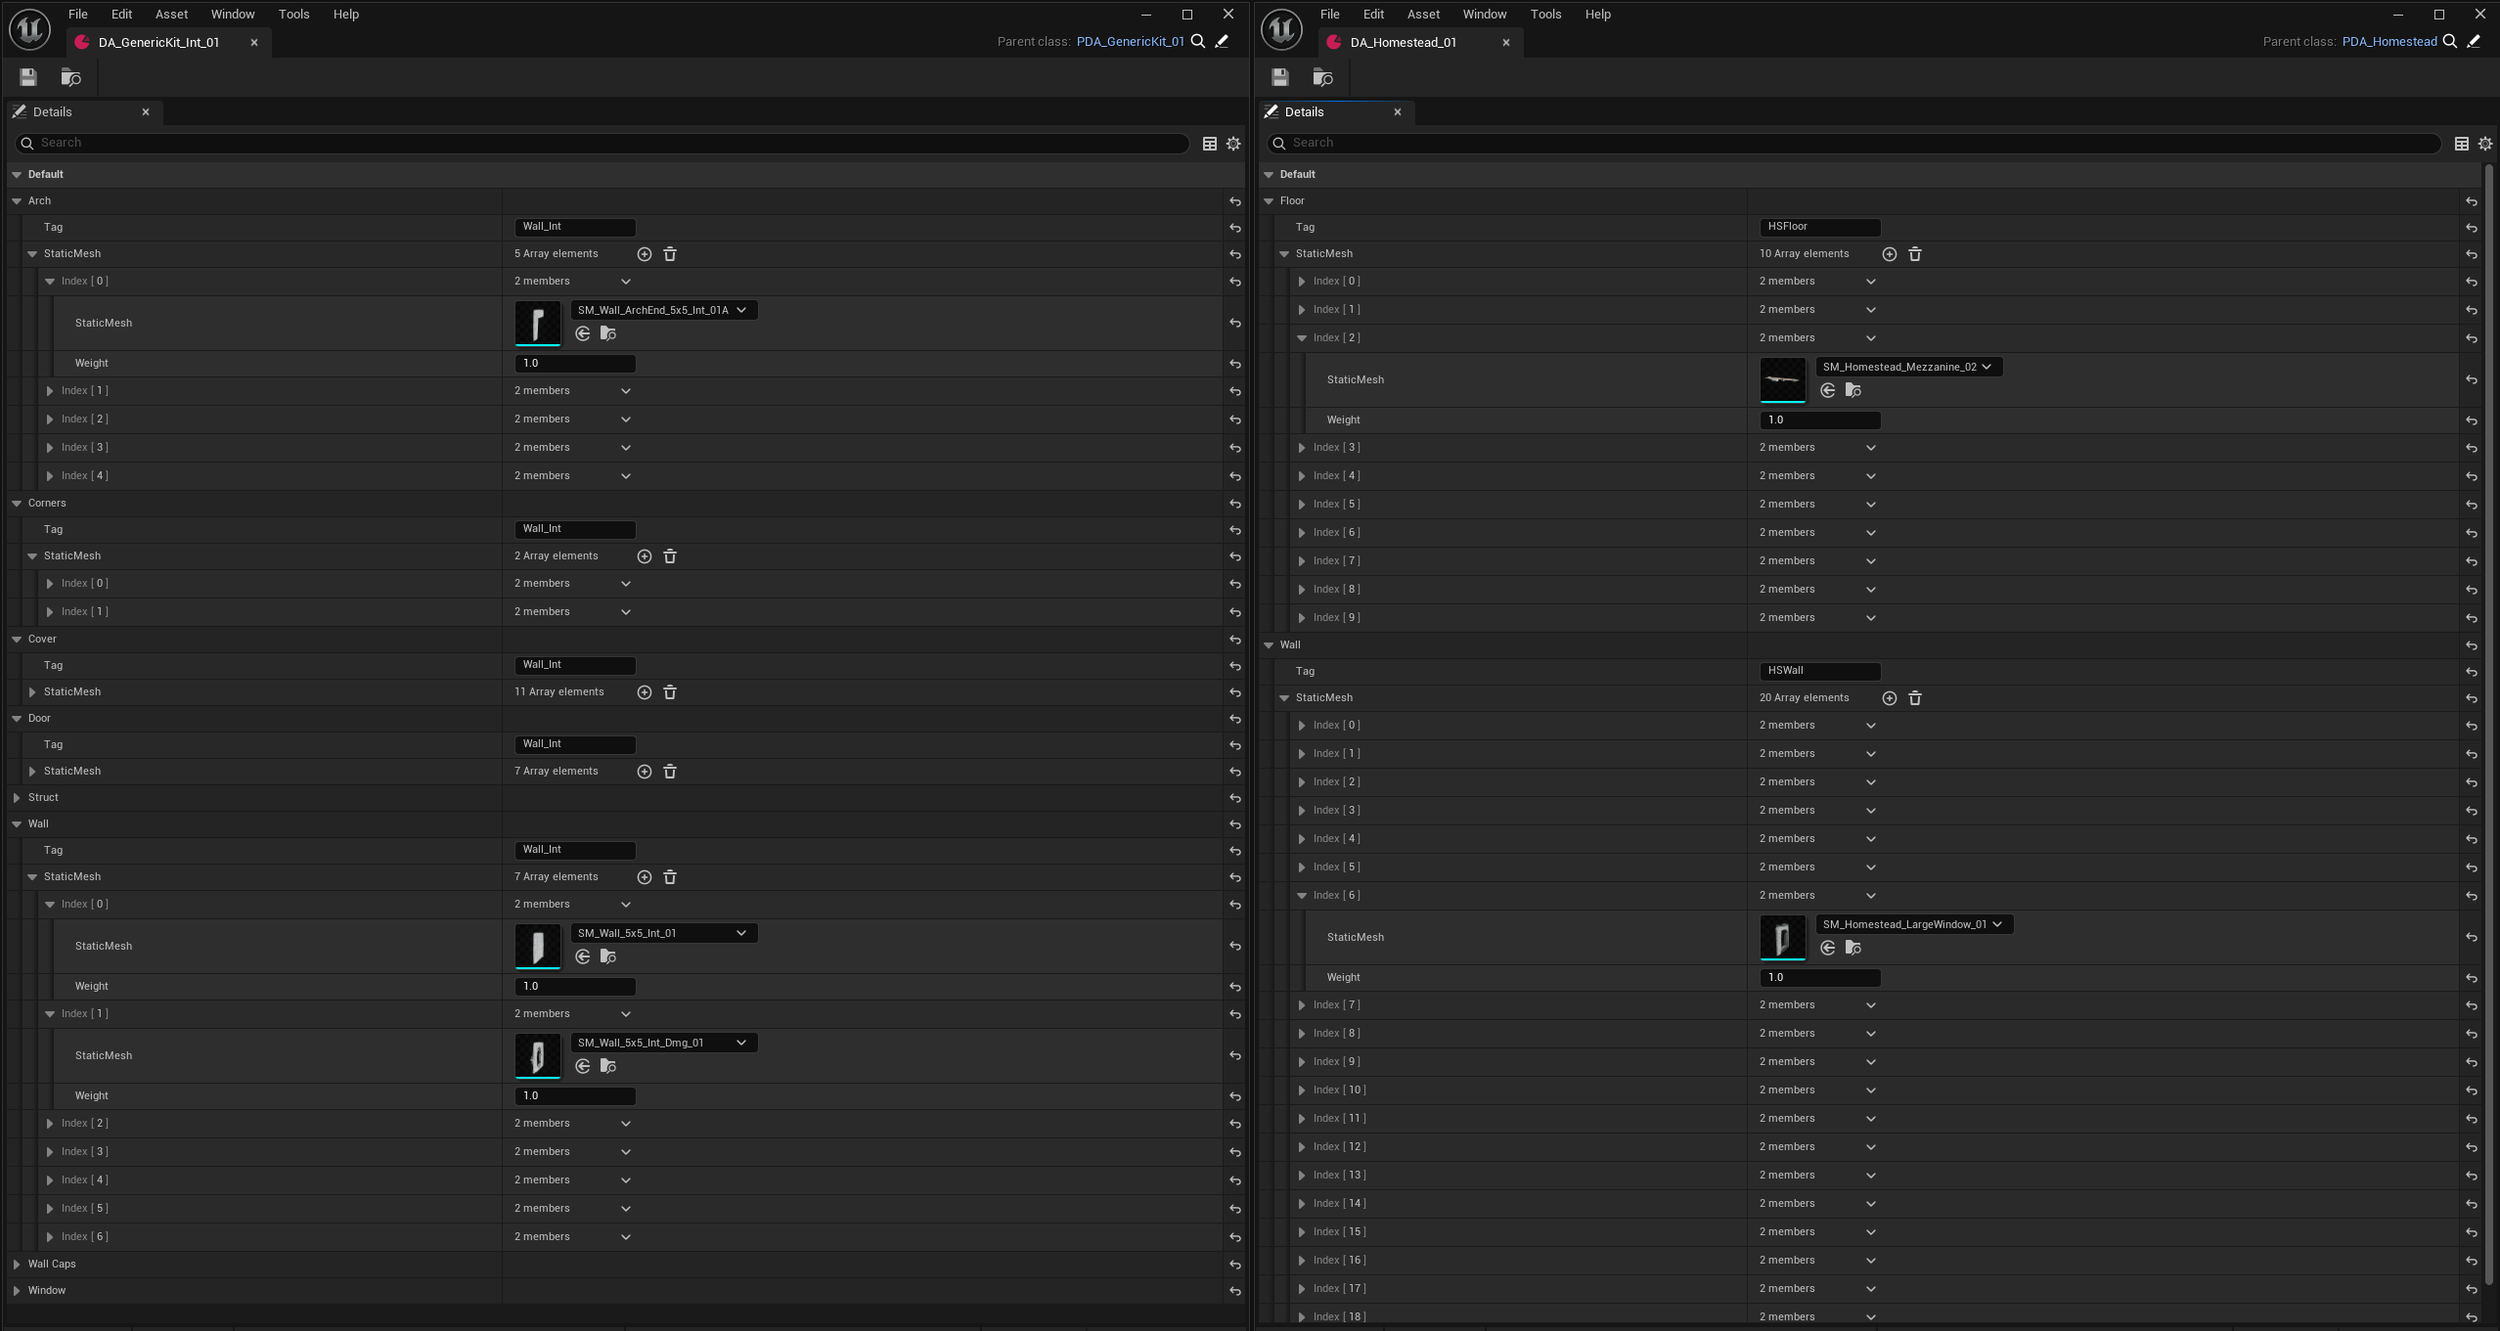
Alongside these catalogues, we have dedicated PCG graphs for our modular and bespoke kits, as well as a single scatter graph for our props. They work by stepping through their data assets row by row and sampling each mesh, either to generate points on the meshes or to spawn meshes onto the existing points from the kit graphs. Whilst we expose some settings on the kit side to control point generation, on the scatter side we can expose anything we might find useful, like density, range and scale. We try to keep these as generic as possible, which gives us a solid baseline to work from whenever we use the graphs.
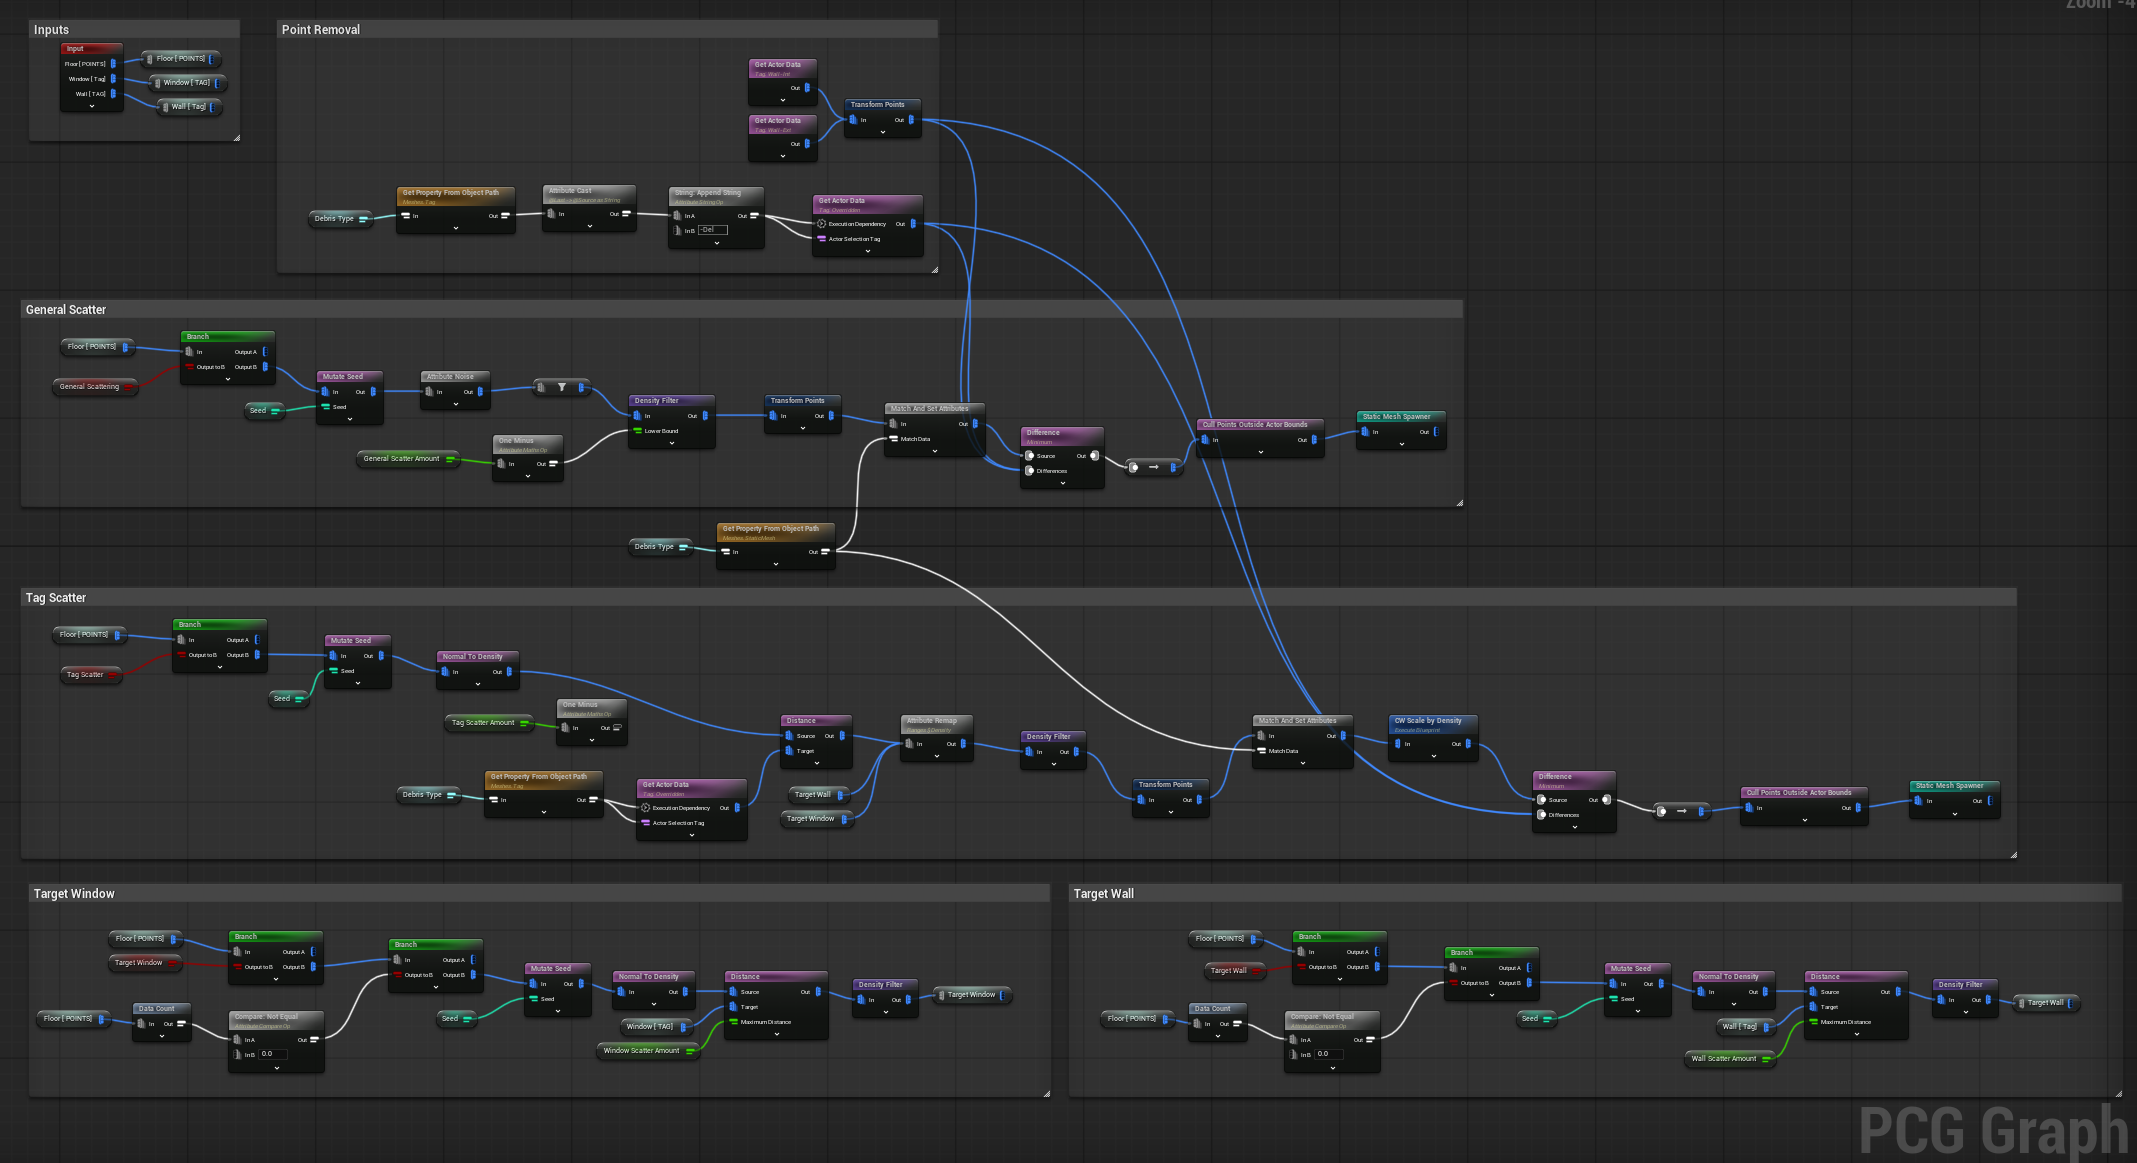
We then have dedicated level-based graphs where we bring the source and scatter graphs together, wiring them up so they can be layered as many times as needed. This is also where the level owner can change the data asset used by the scatter setup and adjust any exposed parameters, like density, range or scale, to suit that particular space.
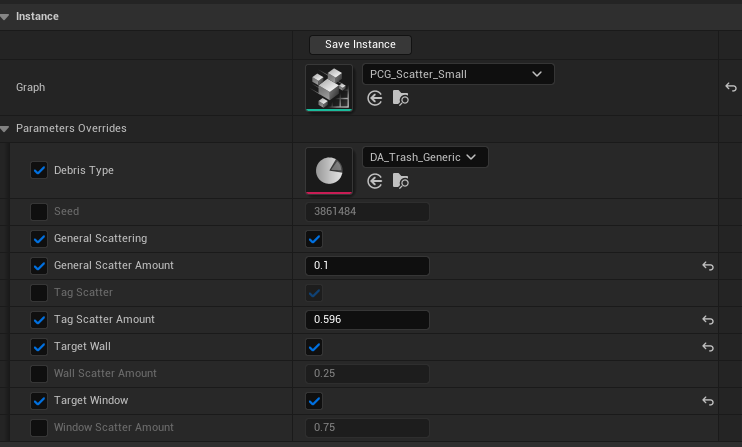
By keeping the data assets and both source and scatter graphs separate, the workflow stays very non-destructive. Artists and designers can create new data assets with whatever meshes and tags they need, and instance everything as many times as they like within a parent level graph, all without ever touching the underlying logic.
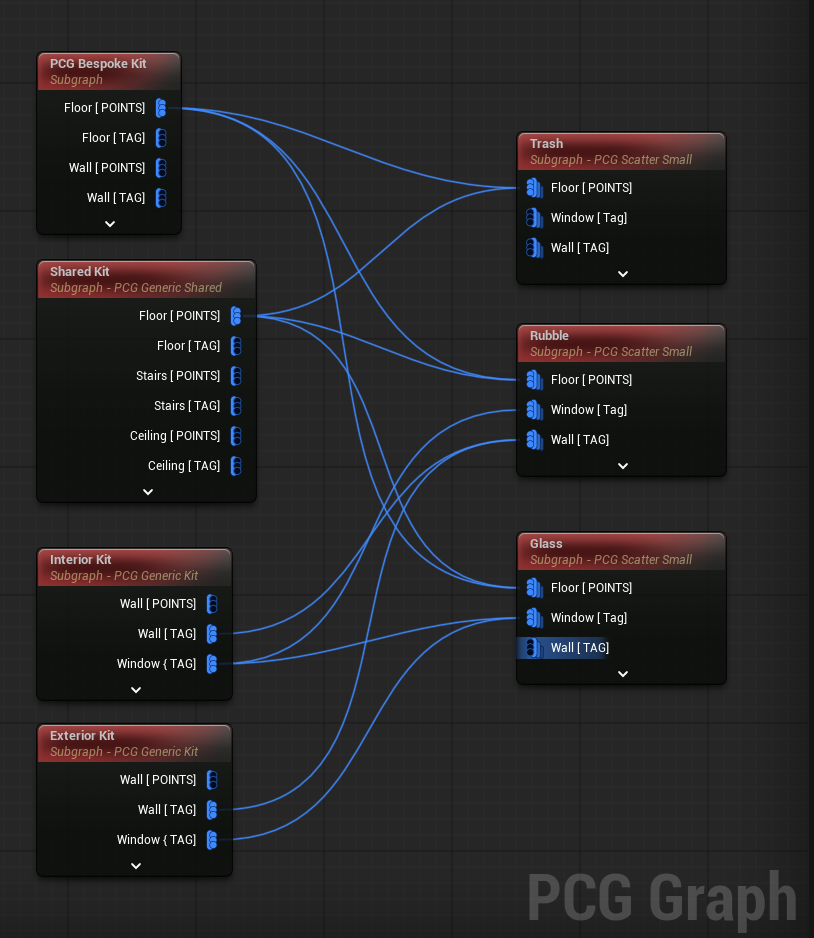
Ultimately, this will allow the team to spawn our scatter props around any mesh we want very easily. This does, however, rely heavily on tagging every source mesh within the sub levels so PCG knows where to spawn the props, which can be very time consuming if there’s hundreds of kit pieces. To help speed up this process, I started building a PCG toolset with a tagging system.
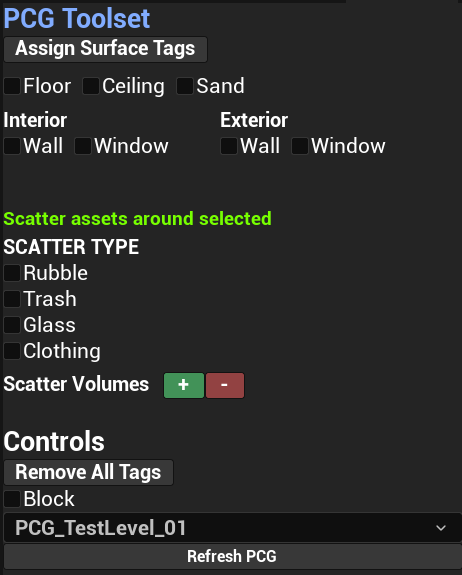
The main feature so far is the 'Assign Surface Tags' button. If you look back at the data assets, you'll see a tag input for each mesh type. When pressed, provided some of the mesh types are checked, this button retrieves the static mesh and tag information from all our source data assets and assigns the tag to the corresponding mesh within the whole level. These checkboxes also offer a manual approach, for example if you don't want every wall tagged. They also double as visual feedback, showing what each mesh is currently tagged as.
Whilst some of our scatter meshes can already spawn around relevant meshes given the source tags (glass around windows for example), others need a bit more of a manual approach where we select assets within the level and assign a tag like rubble or trash.
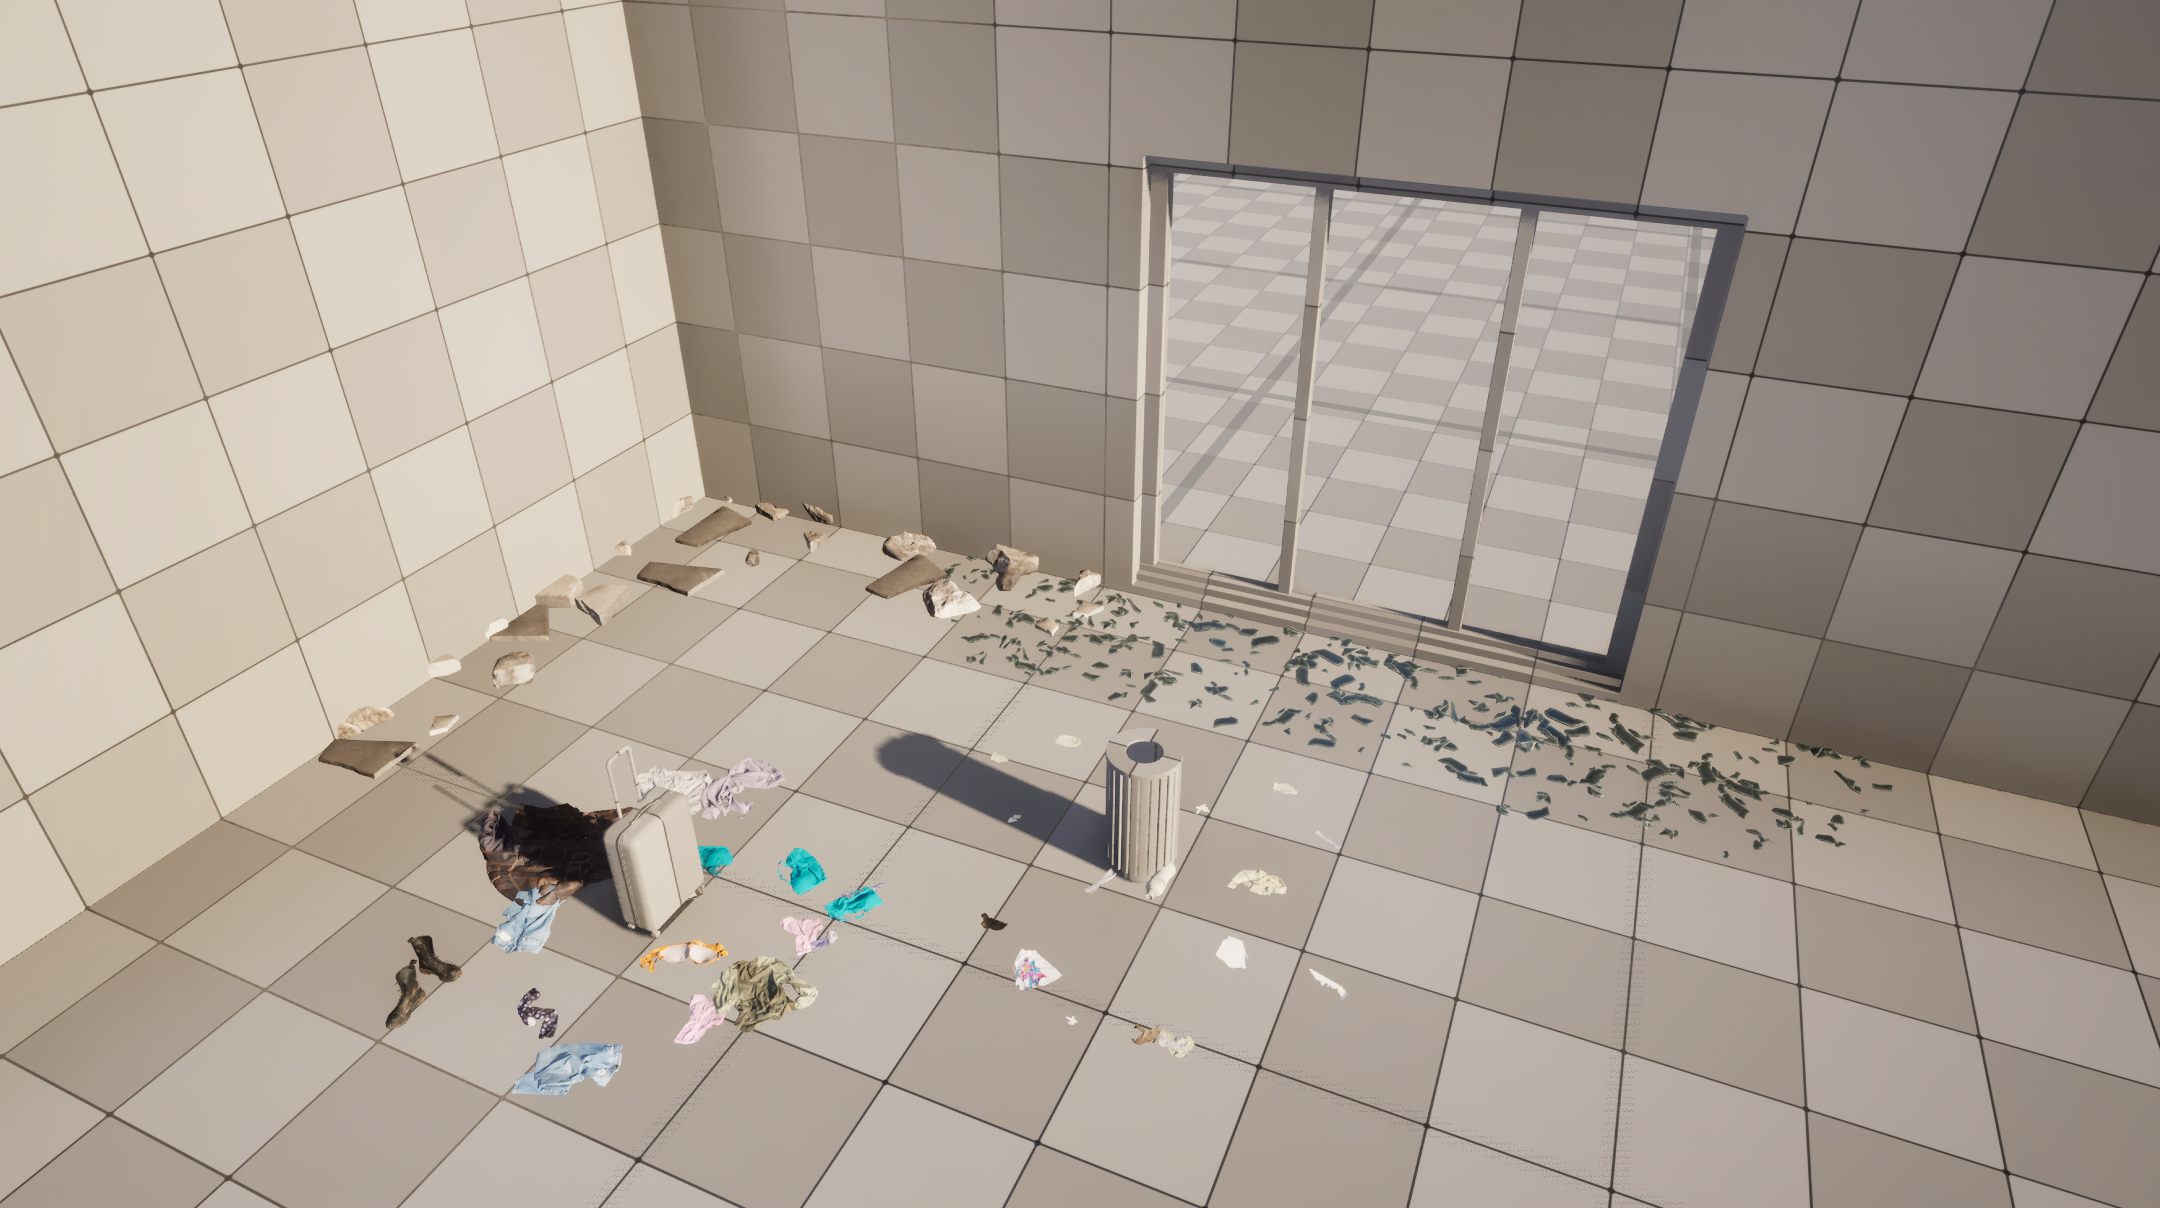
I've also implemented scatter add and remove volumes. The + and – buttons trigger simple blueprints that spawn a coloured volume when pressed, letting the artist either add whatever scatter props are checked in specific areas PCG hasn't reached, or remove them wherever they're not wanted.
The final two features in the PCG Tools are Remove All Tags, which removes every tag within the level (more of a last resort nuke option), and the Block checkbox, which assigns a blocking tag to a selected mesh, filtering out any debris that would intersect with it.
We're still learning as we go with PCG, but this setup is already proving to be a big win when it comes to dressing our environments efficiently. New tools will likely follow, and existing ones like the tagger will keep growing as we find new ways to use them, so watch this space!
